どうもです、タドスケです。
Qt を扱う上で基本となる QWidget クラス。
仕事で Qt を使い始めて、QWidget のリファレンスを見た時に思ったこと。

基本クラスのクセに機能多すぎ!!
しかも各機能の説明は英語なうえ、引数などの説明も全然足りていなくて、リファレンスを見ても「これで何ができるのかわからない」というのが正直なところ。
もっと「やりたいこと」ベースでまとまった逆引きリファレンス的なものがほしいと思ったので、勉強がてらまとめていくことにしました。
QWidget を触っていて「これやりたいなー」と思った時にざっと検索して、具体例を見ながら実装のイメージを掴んでいただけるものを目指します。
量が多いので、逐次更新していきます。
ウィンドウ/ウィジェット という呼び名が登場しますが、どちらも QWidget を指します。
QWidget を単体で表示する時にウィンドウ、ウィンドウ内に組み込まれるときにウィジェットと呼んでいます。
執筆時点での検証環境は以下です。
- Windows 11
- Python 9.0
- Pyside6
- PyCharm 2021.3.3 (Community Edition)
バージョンが異なる場合、そのままのコードでは動かないことがありますのでご了承ください。
更新履歴
- 2023
- 5/23
- isWindow のサンプルを追加
- setFixedSize のサンプルを追加
- 5/14
- map のサンプルを追加
- 5/13
- 不足していた画像を追加
- childAt のサンプルを追加
- clearFocus のサンプルを追加
- setAutoFillBackGround のサンプルを追加
- setForegroundRole / setBackgroundRole のサンプルを追加
- setAttribute のサンプルを追加
- setToolTip / setStatusTip のサンプルを追加
- setMask のサンプルを追加
- scroll のサンプルを追加
- 5/8
- 公開
- 5/23
コード
この記事で紹介しているコードは全て GitHub で公開しています。

実行してみたい場合はこちらからコードをクローンしてください。
ベース実装
QWidget を表示するための基本処理は以下です。
from PySide6 import QtWidgets

app = QtWidgets.QApplication()
window = QtWidgets.QWidget()

# ここに各種処理が入る

window.show()
app.exec()
以降のコード例では、特に記載がない限りこのお決まり処理は省略します。
ウィンドウ
ウィンドウかどうかを調べる
window = QtWidgets.QWidget()
widget = QtWidgets.QPushButton('Button', parent=window)

# 取得
print(window.isWindow())  # True
print(widget.isWindow())  # False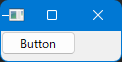
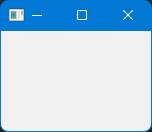
ウィンドウサイズの設定と取得
# 設定
window.resize(150, 100)
# 取得
print(window.size())  # QSize(150, 100)
ウィンドウが指定したサイズになる。
サイズ変更を禁止していなければ、表示後にサイズ変更が可能。
ウィンドウのサイズを変更できないようにする
window.setFixedSize(QSize(200, 100))ウィンドウが指定したサイズになる。
resize と違って、表示後のサイズ変更はできない。
ウィンドウ位置の設定と取得
# 設定
window.move(100, 150)
# 取得
print(window.pos())  # QPoint(100, 150)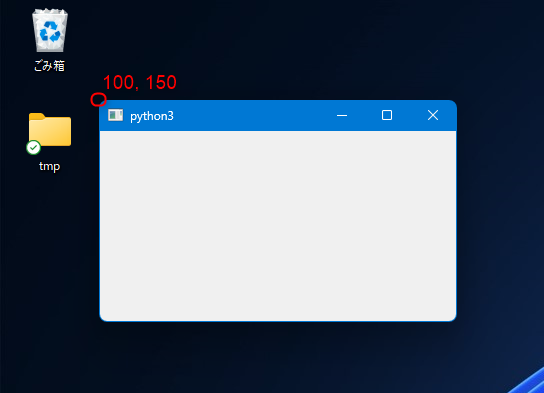
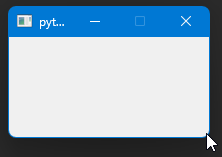
ウィンドウタイトルの設定と取得
# 設定
window.setWindowTitle('タイトル')
# 取得
print(window.windowTitle())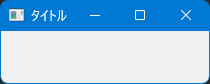
ウィンドウのサイズと位置をまとめて設定/取得する
# 設定
window.setGeometry(150, 100, 400, 300)
# 取得
print(window.geometry())  # QRect(150, 100, 400, 300)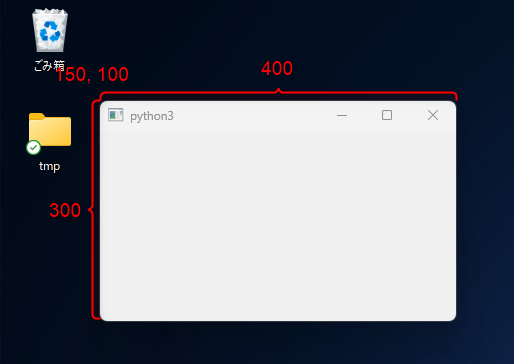
ウィンドウの最小サイズ/最大サイズを設定/取得する
# 設定
window.setMinimumSize(300, 200)
window.setMaximumSize(400, 300)

# 取得
print(window.minimumSize())
print(window.maximumSize())
設定したサイズ以下/以上にはならない。
ウィンドウを最前面に持ってくる
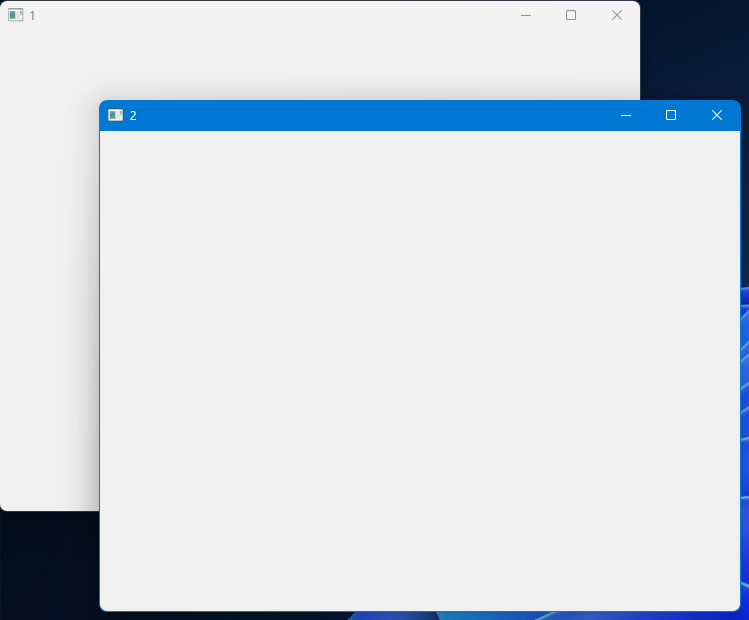
2つのウィンドウを順に生成する場合…
# 準備
window1 = QtWidgets.QWidget()
window1.setWindowTitle('1')
window1.move(0, 0)
window1.show()

window2 = QtWidgets.QWidget()
window2.setWindowTitle('2')
window2.move(100, 100)
window2.show()
後に作ったほう(2)が手前に表示される。
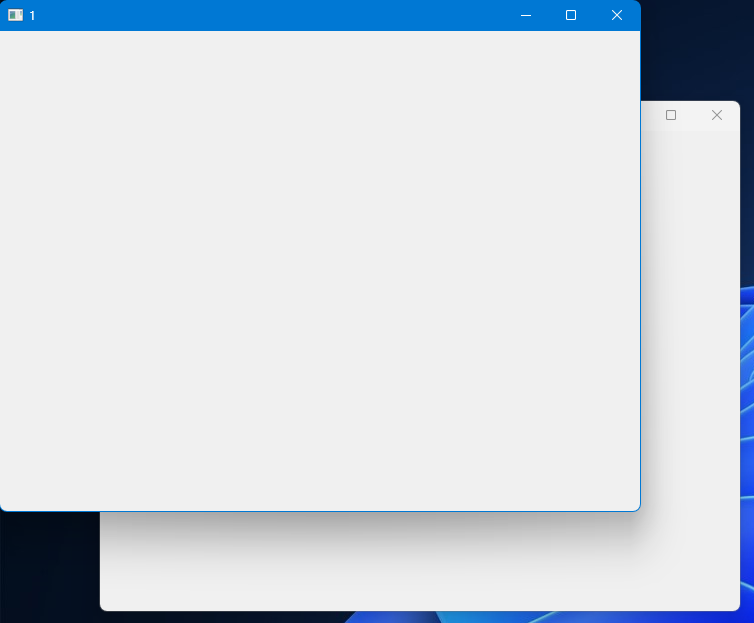
最前面&入力を受け付けるようにする
# 最前面&入力を受け付けるようにする
window1.activateWindow()
1 が前面に来てアクティブになる(タイトルバーの色が変わる)
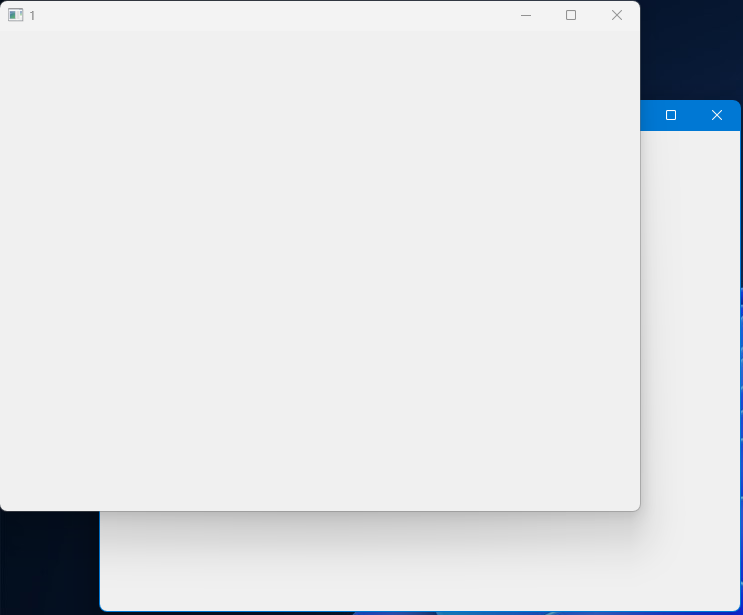
最前面に持ってくるだけ(入力は有効にならない)
# 最前面に持ってくるだけ(入力は有効にならない)
window1.raise_()
1 が前面に来るが、アクティブにはならない(タイトルバーの色は変わらない)
ウィンドウを常に最前面に表示する
window.setWindowFlags(window.windowFlags() | Qt.WindowStaysOnTopHint)他のウィンドウをクリックしても、背面に移動しない。
ウィンドウのフルスクリーンを切り替える
# フルスクリーンで表示する(showの代わりに使う)
window.showFullScreen()
ウィンドウの最小化、最大化、通常表示の切り替え
# 最小化
window.showMinimized()
# 最大化
window.showMaximized()
# 通常に戻す
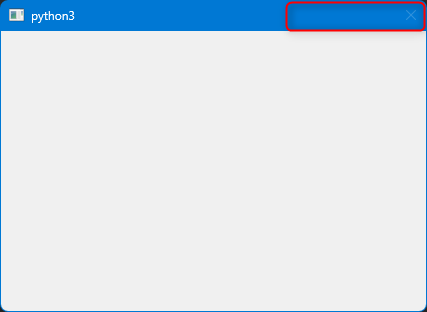
window.showNormal()ウィンドウの最小化ボタン、最大化ボタン、クローズボタンの無効化
# デフォルトのウィンドウ装飾を非表示にし、独自のウィンドウタイトルバーやボタンなどを実装するためのフラグ
window.setWindowFlags(window.windowFlags() | Qt.CustomizeWindowHint)
# 最小化ボタンを無効化
window.setWindowFlags(window.windowFlags() & ~Qt.WindowMinimizeButtonHint)
# 最大化ボタンを無効化
window.setWindowFlags(window.windowFlags() & ~Qt.WindowMaximizeButtonHint)
# 閉じるボタンを無効化
window.setWindowFlags(window.windowFlags() & ~Qt.WindowCloseButtonHint)
最大化/最小化ボタンが消え、閉じるボタンは押せなくなっている。
※タスクバーから閉じる必要がある。
ウィンドウフレームなしの設定
window.setWindowFlags(Qt.FramelessWindowHint)タイトルバー、枠の無いウィンドウが表示される。
※タスクバーから閉じる必要がある。

ウィンドウのモーダル状態を設定/取得する
# 準備
window1 = QtWidgets.QDialog()
window1.setWindowTitle('NonModal(parent)')
window1.setGeometry(100, 100, 200, 100)
window2 = QtWidgets.QDialog(parent=window1)
window2.setWindowTitle('WindowModal(child)')
window2.setGeometry(150, 150, 200, 100)
window3 = QtWidgets.QDialog()
window3.setWindowTitle('NonModal')
window3.setGeometry(200, 200, 200, 100)
window4 = QtWidgets.QDialog()
window4.setWindowTitle('ApplicationModal')
window4.setGeometry(250, 250, 200, 100)

# 設定
window2.setWindowModality(Qt.WindowModality.WindowModal)  # 親に対してのみモーダル
window4.setWindowModality(Qt.WindowModality.ApplicationModal)  # アプリケーション全体に対してモーダル

# 取得
print(f'{window1.windowModality()=}')
print(f'{window2.windowModality()=}')
print(f'{window3.windowModality()=}')
print(f'{window4.windowModality()=}')
親に対してのみモーダル
親じゃないウィンドウは触れる。

アプリケーション全体でモーダル
親かどうかによらず、他のウィンドウには一切触れなくなる。
ウィンドウのアイコンを設定する
# アイコンの設定
window.setWindowIcon(QtGui.QIcon("images/icon.png"))
# アイコンの取得
print(window.windowIcon())
ウィンドウの透明度を設定/取得
# 設定
window.setWindowOpacity(0.5)

# 取得
print(window.windowOpacity())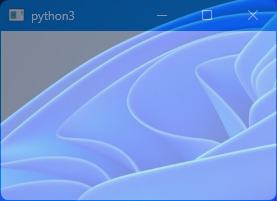
ウィンドウをスクリーン中央に移動する
window.move(0, 0)

# スクリーン情報を取得
screen = window.screen()
screen_geometry = screen.geometry()

# ウィンドウをスクリーン中央に移動する
x = (screen_geometry.width() - window.width()) // 2
y = (screen_geometry.height() - window.height()) // 2
window.move(x, y)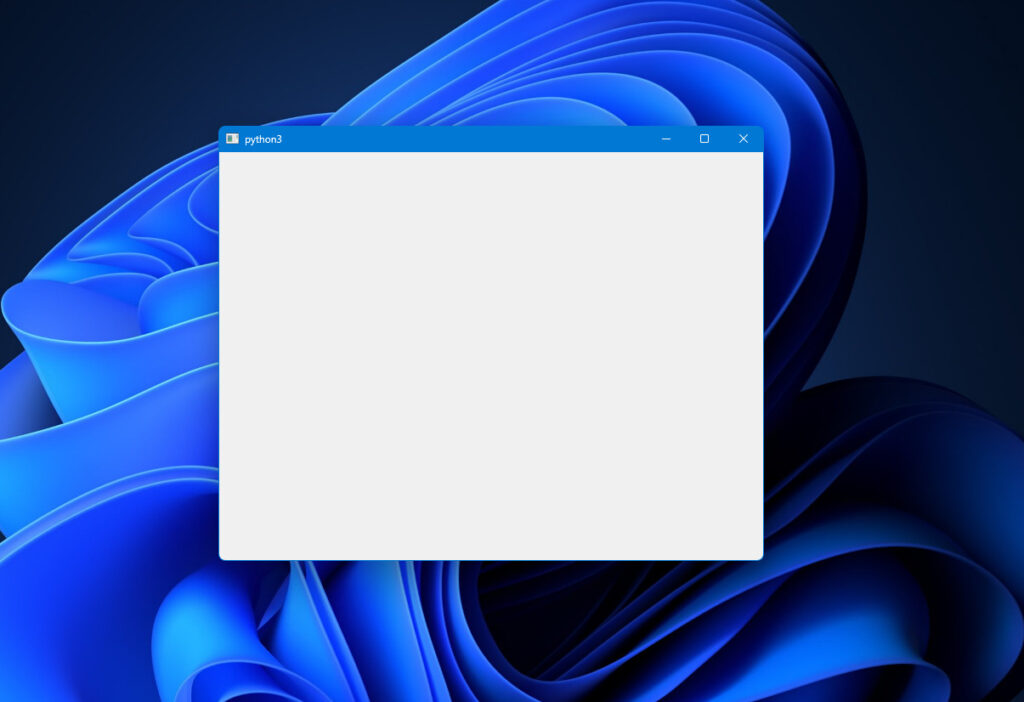
見た目
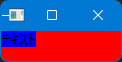
ウィジェットの背景色を塗りつぶすかどうかを設定/取得する
app = QtWidgets.QApplication()
window = QtWidgets.QWidget()
label = QLabel('テキスト', parent=window)

# パレットの設定
window_palette = window.palette()
window_palette.setColor(QPalette.ColorRole.Window, Qt.red)
label_palette = label.palette()
label_palette.setColor(QPalette.ColorRole.Window, Qt.blue)

# 子ウィジェットに設定
label.setPalette(label_palette)
label.setAutoFillBackground(True)  # 背景色を塗りつぶすオプション

# 親ウィンドウに設定
window.setPalette(window_palette)
# label.setAutoFillBackground(True)  # ウィンドウの場合は指定しなくても塗りつぶされる

# 取得
print(window.autoFillBackground())
print(label.autoFillBackground())
print(window_palette.color(QPalette.ColorRole.Window))
print(label_palette.color(QPalette.ColorRole.Window))
setAutoFillBackground(True) を指定する必要があるかどうかは、ウィジェットの種類によって異なる。
例えばウィンドウの場合、指定しなくても背景色が変わるが、QLabel の場合は変わらない。
背景色を変えたい意図があるなら毎回指定したほうが無難。
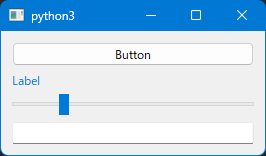
ウィジェットの前景色の設定と取得
# 準備
button = QPushButton('Button')
label = QLabel('Label')
slider = QSlider(Qt.Orientation.Horizontal)
edit = QLineEdit()

layout = QVBoxLayout()
layout.addWidget(button)
layout.addWidget(label)
layout.addWidget(slider)
layout.addWidget(edit)
window.setLayout(layout)

# 設定
color_role = QPalette.ColorRole.Highlight
button.setForegroundRole(color_role)
label.setForegroundRole(color_role)
slider.setForegroundRole(color_role)
edit.setForegroundRole(color_role)

# 取得
print(button.foregroundRole())
print(label.foregroundRole())
print(slider.foregroundRole())
print(edit.foregroundRole())
設定した前景色が何に使われるかはウィジェットによるので、効果が出ないこともある。
このサンプルで見た目に違いが見られたのは QLabel のみ。
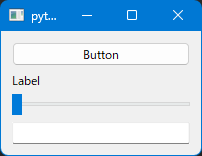
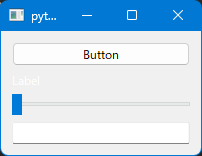
ウィジェットの背景色の設定と取得
# 準備
button = QPushButton('Button')
label = QLabel('Label')
slider = QSlider(Qt.Orientation.Horizontal)
edit = QLineEdit()

layout = QVBoxLayout()
layout.addWidget(button)
layout.addWidget(label)
layout.addWidget(slider)
layout.addWidget(edit)
window.setLayout(layout)

# 設定
color_role = QPalette.ColorRole.Highlight
button.setBackgroundRole(color_role)
label.setBackgroundRole(color_role)
slider.setBackgroundRole(color_role)
edit.setBackgroundRole(color_role)

# 取得
print(button.backgroundRole())
print(label.backgroundRole())
print(slider.backgroundRole())
print(edit.backgroundRole())
設定した前景色が何に使われるかはウィジェットによるので、効果が出ないこともある。
このサンプルで見た目に違いが見られたのは QLabel のみ。
スタイルシートの設定と取得
label = QtWidgets.QLabel('テキスト')

# 設定
label.setStyleSheet(
    "background-color: yellow;"
    "color: red;"
    "margin: 10px;"
)

# 取得
print(label.styleSheet())
#  background-color: yellow;color: red;margin: 10px;border: dashed red;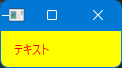
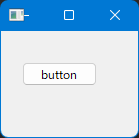
縁と中身の間のスペースを設定/取得する
layout = QtWidgets.QVBoxLayout()
layout.addWidget(QtWidgets.QPushButton('button1'))
layout.addWidget(QtWidgets.QPushButton('button2'))
window.setLayout(layout)

# 設定
left = 10
top = 20
right = 30
bottom = 40
window.setContentsMargins(left, top, right, bottom)

# 取得
print(window.contentsMargins())
レイアウトの上下左右にスペースができる。
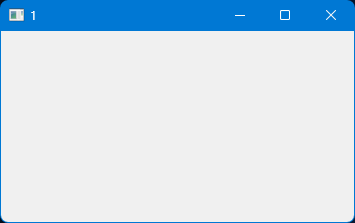
表示/非表示の設定と取得
# 設定
window1 = QtWidgets.QWidget()
window1.setWindowTitle('1')
window1.show()
window1.setVisible(True)

window2 = QtWidgets.QWidget()
window2.setWindowTitle('2')
window2.show()
window2.setVisible(False)

# 取得
print(window1.isVisible())
print(window2.isVisible())
2 は生成されているが表示されない。
レイアウトを設定/取得する
# レイアウトの作成
layout = QVBoxLayout()
layout.addWidget(QPushButton("Button 1"))
layout.addWidget(QPushButton("Button 2"))

# 設定
window.setLayout(layout)

# 取得
print(window.layout())  # QVBoxLayout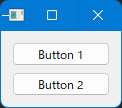
自動リサイズ時の挙動を設定する
class MyWidget(QtWidgets.QPushButton):
    def sizeHint(self) -> QSize:
        """推奨サイズ."""
        return QSize(200, 100)

    def minimumSizeHint(self) -> QSize:
        """最小サイズ."""
        return QSize(100, 50)


app = QtWidgets.QApplication()
window = QtWidgets.QWidget()

widget = MyWidget()
print(widget.sizeHint())  # QSize
print(widget.minimumSizeHint())  # QSize

layout = QtWidgets.QVBoxLayout()
layout.addWidget(widget)
window.setLayout(layout)
ウィジェットのサイズが変更されるときに、適切な推奨サイズと最小サイズが考慮されるようになる。
※強制するわけではなく、最大/最小サイズ設定があればそちらが優先される。
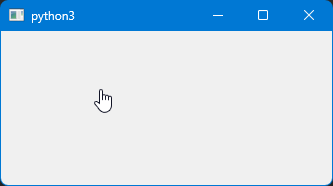
マウスカーソルを設定する
# 設定
window = QtWidgets.QWidget()
window.setCursor(Qt.CursorShape.PointingHandCursor)
window.show()

# 取得
print(window.cursor())
ウィンドウにカーソルをホバーさせると、指の形になる。
再描画を要求する
class RandomCircleWidget(QWidget):
    def __init__(self):
        super().__init__()

        # 円の座標と色を保存するためのリスト
        self.circles = []

    def mousePressEvent(self, event: QMouseEvent):
        if event.button() == Qt.LeftButton:
            # クリックされた座標に円を描画
            pos = event.position()
            x = int(pos.x())
            y = int(pos.y())
            self.circles.append((x, y, QColor(127, 127, 127)))

            # ウィジェットの再描画を要求(これを呼ばないとクリック時に描画されない)
            self.update()
            # self.repaint()  # repaint() でもできるが、連続で呼ぶと重くなるので非推奨

    def paintEvent(self, event):
        # 円を描画
        painter = QPainter(self)
        for x, y, color in self.circles:
            painter.setBrush(color)
            painter.drawEllipse(x - 25, y - 25, 20, 20)
update() を呼ぶと、クリックするたびに円が追加される。
update() を呼ばないと、クリックしても追加されず、ウィンドウのリサイズ時に再描画される。
■update と repaint の違い
update() は遅延描画を行い、イベントループが次に実行されるタイミングで再描画を行いますが、repaint() は即時描画を行い、呼び出されたタイミングで直接再描画を行います。 パフォーマンスを考慮すると、通常は update() を使用することが推奨されます。
動き
フォーカスを設定/取得する
# 準備
window = QtWidgets.QWidget()
edit1 = QtWidgets.QLineEdit()
edit2 = QtWidgets.QLineEdit()
layout = QtWidgets.QVBoxLayout()
layout.addWidget(edit1)
layout.addWidget(edit2)
window.setLayout(layout)
window.show()

# 設定
edit2.setFocus()

# 削除
# edit2.clearFocus()

# 取得
print(edit1.hasFocus())
print(edit2.hasFocus())
何もしなければ edit1 にあるはずのフォーカスが edit2 にある。
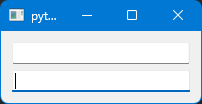
clearFocus() を呼ぶと、設定したフォーカスを削除できる。(edit1 に戻る)
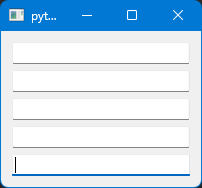
フォーカスポリシーを設定/取得する
edits = [QLineEdit() for _ in range(5)]

# フォーカスポリシーの設定
edits[0].setFocusPolicy(Qt.NoFocus)  # フォーカスを受け取らない
edits[1].setFocusPolicy(Qt.TabFocus)  # タブキーを使ってフォーカスを受け取る
edits[2].setFocusPolicy(Qt.ClickFocus)  # マウスクリックでフォーカスを受け取る
edits[3].setFocusPolicy(Qt.StrongFocus)  # タブキーとマウスクリックの両方でフォーカスを受け取る
edits[4].setFocusPolicy(Qt.WheelFocus)  # タブキー、マウスクリック、およびマウスホイールでフォーカスを受け取る

# フォーカスポリシーの取得
for e in edits:
    print(f'{e.focusPolicy()=}')
#  e.focusPolicy()=<FocusPolicy.NoFocus: 0>
#  e.focusPolicy()=<FocusPolicy.TabFocus: 1>
#  e.focusPolicy()=<FocusPolicy.ClickFocus: 2>
#  e.focusPolicy()=<FocusPolicy.StrongFocus: 11>
#  e.focusPolicy()=<FocusPolicy.WheelFocus: 15>

layout = QtWidgets.QVBoxLayout()
for e in edits:
    layout.addWidget(e)
window.setLayout(layout)
LineEdit ごとにフォーカスを得る方法が違う。
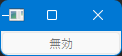
無効(グレーアウト)状態にする
# 設定
button.setEnabled(False)
# 取得
print(button.isEnabled())  # False
無効にされたボタンは押せない。
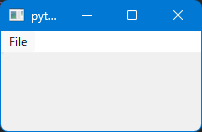
メニューにアクションを追加/取得/削除する
class MainWindow(QMainWindow):
    def __init__(self):
        super().__init__()

        # アクションを生成する
        exit_action = QAction('Exit', self)
        exit_action.triggered.connect(self.close)  # アクション実行時にウィンドウを閉じる

        menu_bar = self.menuBar()
        file_menu = menu_bar.addMenu('File')
        file_menu.addAction(exit_action)  # メニューにアクションを追加

        # file_menu.removeAction(exit_action)  # アクションを削除
        print(f'{file_menu.actions()=}')  # アクションを取得


app = QApplication()
main_window = MainWindow()
main_window.show()
app.exec()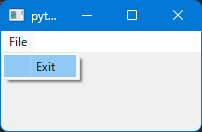
removeAction を呼ぶと、Exit メニューが消える。
removeAction を呼んでもアクション自体の破棄は行われない。
アクションを破棄する場合、removeAction → アクション破棄の順番で呼ばないとクラッシュのおそれがあるので注意!
独自のイベントフィルタを使用する
class MyEventFilter(QObject):
"""独自イベントフィルタのクラス."""
def eventFilter(self, watched, event) -> bool:
if event.type() == QEvent.Type.MouseButtonDblClick: # ダブルクリック
# watched はイベントが実行されたオブジェクト
print(f"ボタンがダブルクリックされました。({watched.text()})")
return True # イベントを処理済みとして、伝播を止める
return False # イベントを処理せず、伝播させる
app = QApplication([])
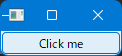
button = QPushButton("Click me")
event_filter = MyEventFilter()
button.installEventFilter(event_filter) # イベントフィルタを設定する
# button.removeEventFilter(event_filter) # イベントフィルタを削除するボタンをダブルクリックすると専用のログが出力される。
ドラッグ&ドロップを処理する
class DropArea(QWidget):
"""ドロップを受け入れるウィジェット."""
def __init__(self):
super().__init__()
self.setAcceptDrops(True) # ウィジェットがドロップ操作を受け入れるように設定
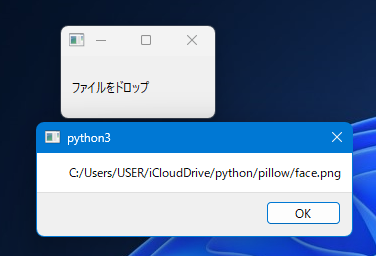
self.label = QLabel("ファイルをドロップ")
layout = QVBoxLayout()
layout.addWidget(self.label)
self.setLayout(layout)
def dragEnterEvent(self, event: QDragEnterEvent):
"""ドラッグされた時に呼ばれます."""
# URL(ファイルパス)が含まれていたら処理
if event.mimeData().hasUrls():
event.acceptProposedAction()
def dropEvent(self, event: QDropEvent):
"""ドロップされた時に呼ばれます."""
for url in event.mimeData().urls():
file_path = url.toLocalFile()
# ファイルパスをメッセージボックスで表示
msg = QMessageBox()
msg.setText(file_path)
msg.exec()ファイルをドラッグ&ドロップすると、メッセージボックスでパスが表示される。
mimeData から取れるデータ
| データ形式 | 判定メソッド | 取得メソッド |
|---|---|---|
| URL(ファイルパス) | hasUrls() | urls() |
| テキスト | hasText() | text() |
| HTML | hasHtml() | html() |
| イメージ | hasImage() | imageData() |
| カラー | hasColor() | colorData() |
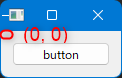
マウスカーソルの動きを監視する
class MyWidget(QtWidgets.QWidget):
    """マウスカーソルイベントを受け取るウィジェット."""

    def __init__(self):
        super().__init__()

        # マウス追跡を有効化
        self.setMouseTracking(True)

        self.label = QtWidgets.QLabel('pos(0, 0)')
        layout = QtWidgets.QVBoxLayout()
        layout.addWidget(self.label, alignment=Qt.AlignmentFlag.AlignTop)
        layout.addSpacing(100)
        self.setLayout(layout)

    def mouseMoveEvent(self, event: QtGui.QMouseEvent):
        """マウス移動時に呼ばれる."""
        if event.type() == QtGui.QMouseEvent.Type.MouseMove:
            pos = event.position()
            self.label.setText(f'pos({int(pos.x())}, {int(pos.y())})')
ウィンドウ内をマウスホバーすると、カーソル座標が表示される。
setMouseTracking(True) を呼ばなくても、マウスの左ボタンを押してドラッグするときにはmouseMoveEvent が呼ばれます。
これは、ドラッグアンドドロップ操作やマウスでの選択操作など、一般的なアプリケーションでよく使用される動作がデフォルトでサポートされるようにするためです。
しかし、マウスボタンを押していない状態でのマウス追跡は、通常は必要とされないため、setMouseTracking メソッドを使って明示的に有効にする必要があります。
マウスホバー時の説明テキストと、表示する長さを設定/取得する
# 設定
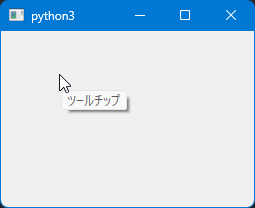
window.setToolTip('ツールチップ')
window.setToolTipDuration(1000)
# 取得
print(window.toolTip()) # ツールチップ
print(window.toolTipDuration()) # 1000ウィンドウ上にマウスカーソルをもってくると、説明文が 1秒(1000ミリ秒)表示される。
マウスホバー時にステータスバーに表示するテキストを設定/取得する
window = QtWidgets.QMainWindow()
window.setStatusBar(QStatusBar())

# 設定
window.setStatusTip('ステータスチップ')

# 取得
print(window.statusTip())  # ステータスチップ
ウィンドウ上にマウスカーソルをもってくると、ステータスバーにテキストが表示される。
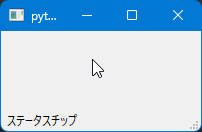
ステータスバーは QMainWindow の構成要素なので、ステータスバーが追加されていないと効果がない。
未分類
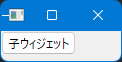
親子関係を設定/取得する
# 設定
window1 = QtWidgets.QWidget()
window2 = QtWidgets.QPushButton('子ウィジェット', parent=window1)
window1.show()

# 取得
print(window1.parent())  # None
print(window2.parent()) # window1- 親が動くと子も動く
- 親が消えると子も消える
独自のプロパティを設定/取得する
# 設定
window.setProperty("my_property", "Custom Property")

# 取得
print(window.property("my_property"))  # "Custom Property"
活用例
- ボタンが押された先でプロパティを取得して、どのボタンが押されたかを判定する。
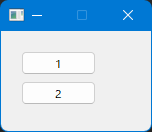
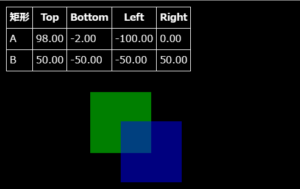
全ての子ウィジェットを含む領域の取得
button1 = QtWidgets.QPushButton('1', parent=window)
button1.move(10, 10)
button2 = QtWidgets.QPushButton('2', parent=window)
button2.move(80, 50)

# 取得
print(f'{window.childrenRegion()=}')  # QRegion(size=2, bounds=(10,10 170x70) - [(10,10 100x30), (80,50 100x30)]
print(f'{window.childrenRect()=}')  # QRect(10, 10, 170, 70)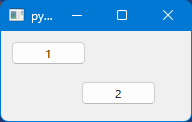
- childrenRegion:子ウィジェットの形状に従った正確な領域
- childrenRect:子ウィジェットを囲む最小の矩形領域
子がポップアップウィンドウの場合は含まれないので注意。
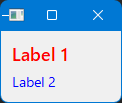
オブジェクトに名前をつける
label1 = QLabel("Label 1")
label2 = QLabel("Label 2")

# ウィジェットに名前を設定
label1.setObjectName("important_label")
label2.setObjectName("normal_label")

# 名前を取得
print(label1.objectName())
print(label2.objectName())

# 名前を指定してスタイルシートを設定
app.setStyleSheet("""
    QLabel#important_label {
        font-size: 18px;
        font-weight: bold;
        color: red;
    }

    QLabel#normal_label {
        font-size: 14px;
        color: blue;
    }
""")

layout = QVBoxLayout()
layout.addWidget(label1)
layout.addWidget(label2)
widget = QWidget()
widget.setLayout(layout)
widget.show()

# 名前を指定して子ウィジェットを検索
w = widget.findChild(QLabel, 'important_label')
print(w.text())
名前をつけておくと、スタイルを名前単位で設定したり、ボタンの clicked シグナル内で押されたボタンを判別したり、様々な用途に利用できる。
指定された座標にある子ウィジェットを取得する
button = QPushButton('button', parent=window)
button.move(10, 10)

print(window.childAt(10, 10))  # button
print(window.childAt(9, 9))  # None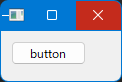
レイアウト利用時の注意点
レイアウトを使用する場合、レイアウトの領域内=レイアウト内のウィジェットとみなされるので注意。
例えば以下の例。
layout = QVBoxLayout()
layout.addWidget(QPushButton('button'))
window.setLayout(layout)

print(window.childAt(0, 0))  # button
(0, 0)地点は空白に見えるが、QVBoxLayout の QPushButton が配置された領域なので、childAt(0, 0) は None ではなく QPushButton を返す。
様々な属性を設定/取得する
# 設定
window.setAttribute(Qt.WidgetAttribute.WA_AcceptDrops)

# 取得
print(window.testAttribute(Qt.WidgetAttribute.WA_AcceptDrops))  # True
print(window.acceptDrops())  # 同じ効果
指定できる属性は他にもいろいろある。
setAcceptDrops のように、多くの属性には専用の関数が用意されているので、わざわざ setAttribute を使わなくても済むケースも多い。
たとえばオンにしたい WidgetAttribute をリストで保存しておいて、後で for 文でまとめて setAttribute したいケースなどで使えるかも。見た目をカスタマイズできるアプリなどに。
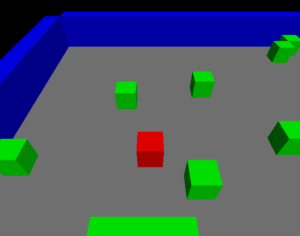
子ウィジェットの位置をまとめて移動する
button1 = QPushButton('1', parent=window)
button1.move(0, 0)
button2 = QPushButton('2', parent=window)
button2.move(0, 30)

window.show()
window.scroll(20, 20)  # 右下に 20 px ずつスクロール
print(window.childAt(0, 0))  # 実際にウィジェットが移動するので、元の位置からは取得できない
子ウィジェットたちがまとめて移動する。
描画だけでなく実際の位置も移動しているので、位置を指定する関数(childAt など)の結果も変わる。
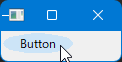
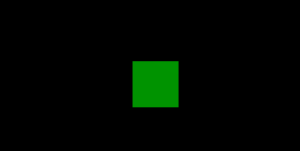
ウィジェットを円形などの特殊な形状にしたい
# 円形のマスクを定義
mask = QRegion(2, 2, 70, 20, QRegion.Ellipse)
# 設定
button.setMask(mask)
# クリア
# button.clearMask()
# 取得
print(button.mask())
ボタンが円形に表示される。
表示だけでなく動作にも影響がある。(円の外側の部分はクリックできない)
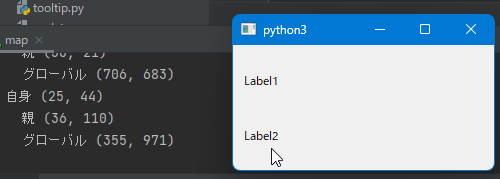
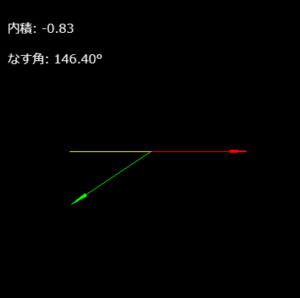
親ウィジェット/スクリーン上の座標に変換する
class MyLabel(QLabel):
    def mousePressEvent(self, event: QMouseEvent):
        if event.button() == Qt.LeftButton:
            pos_in_self = event.position().toPoint()
            pos_in_parent = self.mapToParent(pos_in_self)
            pos_in_global = self.mapToGlobal(pos_in_self)
            print(f'自身 {pos_in_self.toTuple()}')
            print(f'  親 {pos_in_parent.toTuple()}')
            print(f'  グローバル {pos_in_global.toTuple()}')

            # 逆変換
            print(self.mapFromParent(pos_in_parent).toTuple())  # pos_in_self
            print(self.mapFromGlobal(pos_in_global).toTuple())  # pos_in_self


label1 = MyLabel("Label1", parent=window)
label2 = MyLabel("Label2", parent=window)

layout = QVBoxLayout()
layout.addWidget(label1)
layout.addWidget(label2)
window.setLayout(layout)
2つめのラベルをクリックした時の状態。
親はウィンドウ内の座標に変換される。
グローバルはスクリーン上の座標。
関連記事


コメント
コメント一覧 (1件)
[…] 【Qt】実例つき、QWidget 逆引きリファレンス | しぬまでワクワクしていたい どうもです、タドスケです。 Qt を扱う上で基本となる QWidget クラス。 […]